
I was first introduced to the fingernail grind and how to really use it at the AAW symposium (1997 San Antonio) by watching David Ellsworth and John Jordan demonstrate. (For some insight to the origin of the grind, read this interview with David Ellsworth) I was amazed at how clean of a cut they were able to accomplish with just a gouge, no scraping or sanding. Well after extensive research and years of training, I can confirm they can still accomplish the same with just a gouge.
Since I wanted to learn how t use the fingernail grind in my woodturning, I needed to learn how to grind this profile. After all, if the grind isn’t consistent, you will have great difficulty in learning to use it.
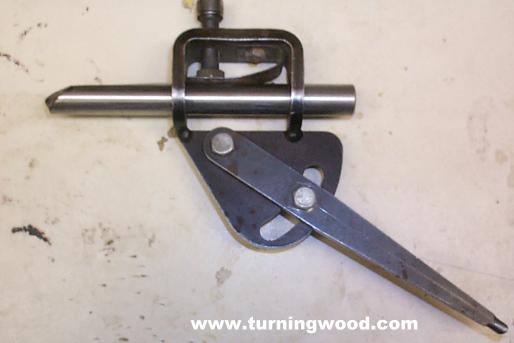
What we are here to talk about is how to grind the fingernail gouge and how to do it consistently. I am going to assume that you know how to use a grinder, and that you have properly installed a Oneway Wolverine grinding system and that your grinding wheels are true, faced and in good working order.
My recommendation is that you start with a brand new, factory ground Ellsworth Gouge, or the tool angle sample version available from Packard Woodworking (800) 683-8876, part number 148802). It is a piece of steel, shaped just like how you want to have your own gouge’s end up. These will act as a template in setting up your jigs.
I will show you how to use the Oneway Wolverine grinding jig system and Vari-grind attachment and a standard grinder. From there, I will show you how to adapt it to the Tormek wet grinding system. The principles here are easily adaptable to homemade jigs or other off the shelf grinding systems. Most of the work is getting the geometry correct for rolling over onto the sides. I will also show you how to figure out which direction to adjust the jig, and what makes a good grind and troubleshooting your grind.
The will also discuss some alternatives to the Oneway that I have seen and possible ways to adapt them.
First, you must have the jig setup within the guideline set forward by Oneway in their instructions. They’re setup instructions state that the center of the wheel needs to be 6.25 to 6.5 from the top of the jig V arm.
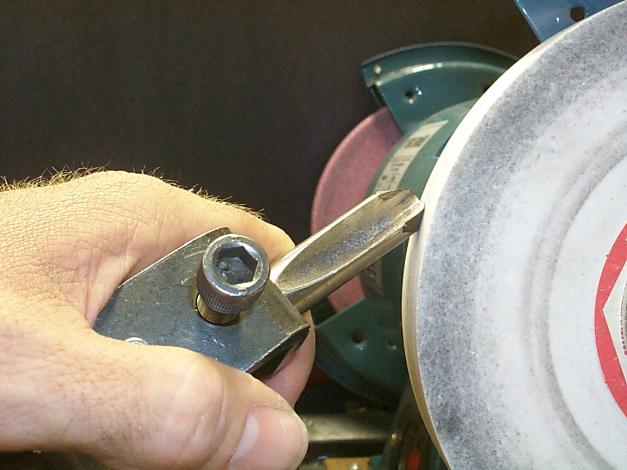
Set the Vari-Grind at about 25 degree angle and put the tool angle sample in the jig as show. The front should protrude by 2 ½”. (The picture below shows a simple stop block for the front of the grinder). Use a black permanent marker and mark the face of the tool steel this will act as a guide and give to feedback to how close to the correct setup.
 UNPLUG THE GRINDER, for the time being we will only be moving the wheel by hand, because we don’t want to grind away the steel on our tool angle sample and alter the angle.
Now put the Vari-Grind into the pocket of the V arm and adjust the distance so the angle of the tool matches up with the grinding wheel. With the tool against the wheel, rotate the wheel (upwards) by hand a few turns. There should be an even silver stripe vertical through the marker. If it is wide at the bottom, move the V arm out about 1/32″ at a time. Use the marker again and rotate the wheel again. Repeat this process until the strip is the same width and solid, all the way up the face of the bevel. If it is wide at the top and doesn’t reach, or is narrow at the bottom, adjust the arm in a smidgen and do the marker and rotation routine again until you have a consistent stripe.
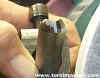
 Notice that I have removed the knob from my vari-grind jig and I tighten it with an allen wrench.
Now that we have the bevel angle correct, turn the gouge on one side, rotating the wheel by hand, then turn to the other side and repeat the process. This is used to check that you have the gouge face flat in the jig and not rotated. In a perfect world, you will see a perfect silver stripe top to bottom, the same on each edge. More likely, you will see the silver area on the top on one side and the bottom on the other side.
This indicates that the gouge is rotated, since the flat on the flute doesn’t go back far enough to keep it flat in the jig. Use the marker again and rotate the “gouge” in the direction of the side with the silver area in the lower part. Repeat his until you get the marker rubbed off in the same area on both sides (regardless of whether it is the top or the bottom), and a solid stripe across the front.
Now that you are getting the marker to wear off consistently , if it is rubbing off at the bottom only, this means that you need more angle on the jig. Loosen the two bolts on the jig and move the arm just a smidgen towards the bottom. Tighten the bolts back up, use the marker on the bevel and adjust the arm out to match the front bevel angle up to the wheel again. Move the wheel with your hand (clockwise) and check your marker wear again. If it is a solid strip up the front, turn it on it’s side and check to see where the wear is, and it should be closer towards a stripe up the side.
 If the marker is worn off of the top of the side, loosen the bolts on the Vari-grind and move the arm closer to the top (where the gouge is). Make your moves in very little increments and make sure to apply more marker to the bevel each time. After each move, you will need to adjust the length of the arm each time to get the front angle of the bevel lined up each time. (As you can see on photo left, the miter saw was used in this case).
With a little time, you will turn the wheel and get the marker rubbing off evenly on all sides of the tool sample.
Once you get the angles correct, mark the arm with a marker or make some scratches with a hacksaw blade on the V-arm so you can quickly readjust the arm right back to where it needs to be each time. Do the same for the Vari-grind jig.
The key is to be able to quickly and easily grind the gouge so that you can get right back to turning. For information on how to use the gouge correctly , I suggest that you look into the Ellsworth video (part of #1) or the Phil Pratt video (available through the AAW).
The other alternative, once you have the proper profile, you can touch it up on the Tormek, for an even better edge. Click here to learn how to sharpen the same gouge using the Oneway Vari-grind on the Tormek wet grinder.
Source: bestofmachinery.